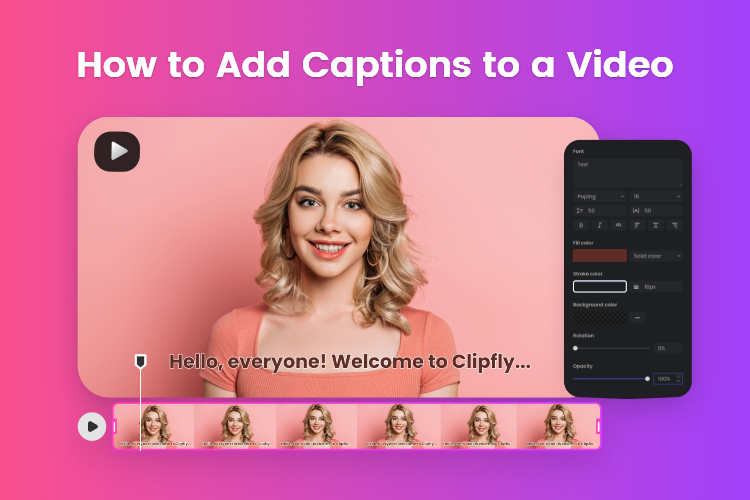
How to Add Captions to a Video: 5 Easy Ways
Adding captions to a video is essential for content creators looking to boost their videos. Captions not only make your videos more inclusive for individuals with hearing impairments, but they also improve the overall user experience and can even boost your video’s discoverability.
In this blog, we will walk you through five easy ways on how to add captions to a video, regardless of your level of technical expertise. Get ready to enhance your video content and reach a wider audience with these methods. Let’s dive in!
Table of Contents:
What’s the Difference Between Captions and Subtitles
Captions and subtitles serve similar purposes but are intended for different audiences and use cases.
Captions: Captions are primarily designed for viewers who are deaf or hard of hearing. They provide not only the dialogue spoken in the video but also descriptions of other relevant audio elements, such as background noises, music, and sound effects. Captions aim to make video content accessible to individuals who may not be able to hear the audio.
Subtitles: Subtitles, on the other hand, are intended for viewers who can hear the audio but may not understand the language spoken in the video. Subtitles provide a translation of the spoken dialogue or text in a different language, allowing viewers to follow the content in their preferred language.
Why Need to Add Captions to a Video?
In the highly competitive realm of online video creation, it’s crucial to constantly seek innovative methods to maintain the competitiveness of your content. Incorporating captions into your video content not only expands its reach but also yields numerous advantages. Here are some of the key advantages of captioning your videos.
- Make Videos More Accessable
Captions make video content accessible to a wider audience, including individuals who are deaf or hard of hearing. They ensure that everyone, regardless of their hearing abilities, can fully understand and enjoy the video.
- Search Engine Optimization (SEO)
Adding captions to your videos can improve your video’s search engine ranking. Search engines can index the text within captions, making your content more discoverable online.
- Multilingual Audiences
Captions can be translated into multiple languages, allowing your content to reach a global audience and enabling viewers who speak different languages to enjoy your videos.
- Improve User Experience
Captions contribute to a positive user experience. They demonstrate a commitment to accessibility and inclusivity, which can enhance your brand’s reputation.
How to Add Captions to a Video (Step by Step)
There’re many ways you can add captions and subtitles to your videos. Here we list five easiest ways for you.
How to Add Captions to a Video with Clipfly?
Clipfly is an all-in-one professional video editing solution, catering to all your creative needs in one convenient platform. With its intuitive user interface, Clipfly ensures a user-friendly experience for creators of all skill levels.
To craft captions or subtitles that complement your video, you can type the script manually and precisely adjust the timing. This allows you to synchronize the text with your video’s dialogue or visuals, ensuring a cohesive and engaging viewing experience for your audience.
Here’s how to add YouTube video captions:
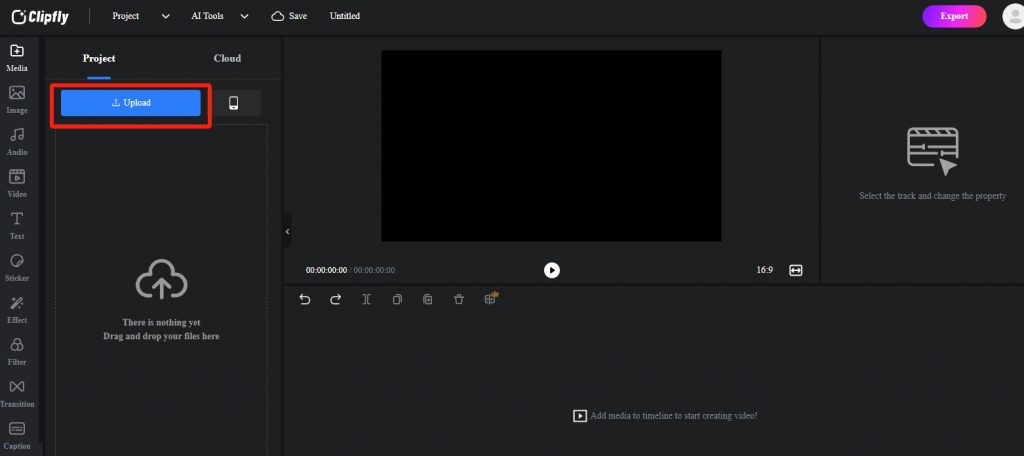
1. Upload Your Video
After preparing your video, go to Clipfly, and click the button “Try for Free” to get started. Click “Upload” to import your media.(You can upload videos, images, or audio files here.)
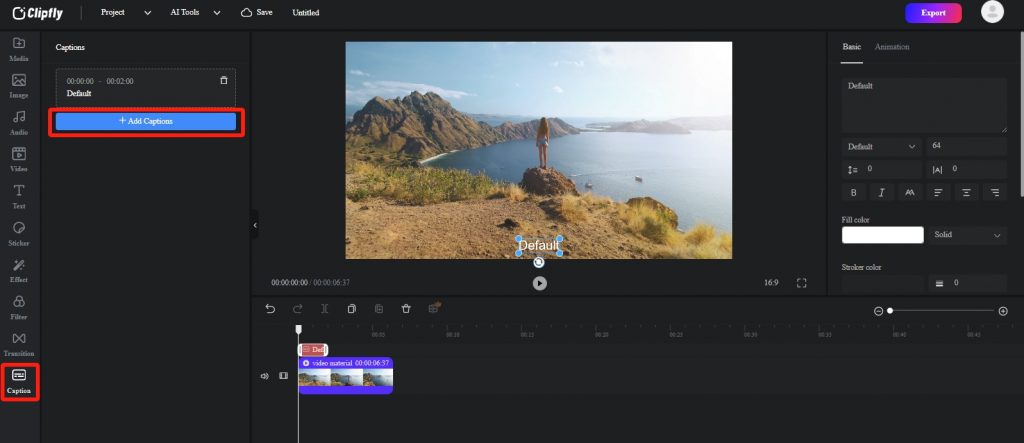
2. Add and Edit the Captions
Find the “Caption” option in the left toolbar and click on “Add Captions.” From there, you can refine your script and adjust the timing within the text box. After completing the editing process, freely position your text within the video by dragging it to your desired location.
You can also alter the duration by adjusting the caption timeline. Customize your captions further by changing their font, color, size, and more to suit your preferences.
3. Export Your Video
When you’re content with your captioned video, download it in high-quality format by clicking the “Export” button in the upper-right corner. Share your video across your social media platforms with ease.
How to Add Captions to a Video on YouTube
YouTube is one of the most popular video sharing platforms and you can generate subtitles directly on YouTube, however, we recommend proofreading the content as the subtitles generated by AI may not always be accurate. To ensure precision and avoid potential issues, you can also upload your own script file to add subtitles to the video.
Here’s how to create auto video captions on YouTube:
1. Access YouTube Studio
Once you sign in YouTube. Click on your profile picture in the top right corner of the YouTube homepage and select “YouTube Studio” from the drop-down menu.
2. Select the Video
Click on “Videos” on the left sidebar to see a list of your uploaded videos. Choose the video for which you want to add captions to. Then, click on the video’s title to open its details page, and click on the “Subtitles” tab.
3. Select a Language
In the “Subtitles” tab, you’ll see an option labeled “Add language.” Click on this option. Next, select your desired language. If you want English auto-captions, choose “English (Automatic).”
4. Wait for Auto Captions to Process
YouTube will automatically generate captions for your video. This process time depending on the length of your video.
5. Review and Edit Auto Captions
Once auto captions are generated, you should review them for accuracy. Auto captions are not always perfect and may contain errors or inaccuracies. To edit the captions, click on the “Edit” button next to the language you selected.
6. Publish Your Video
After reviewing and editing the captions, click the “Publish” button to make the auto captions available to viewers.
How to Add Captions to a Video on Facebook?
Facebook employs AI to auto-create captions once you’ve uploaded a video, but this feature is exclusively available for Facebook Pages associated with businesses or organizations. If you’re uploading a video to your personal account, you’ll need to manually create an SRT file and upload it.
When you upload a video to a Facebook Page, you have the option to review and modify the automatically generated captions or provide your own SRT file prior to publishing your content. Following video upload, simply click on “Subtitles and Captions” located on the right side of your screen to either edit the captions generated by Facebook or upload your own. This allows for enhanced control over the captioning process on Facebook Pages.
Here’s how:
1. Start the Video Upload
Click the “Publish” or “Post” button to start the video upload.
2. Edit Your Video
After the video is uploaded and processing, click on the video on your timeline to open it. Below the video, you’ll see a “More” button (represented by three horizontal dots). Click on it to reveal additional options. Next, choose “Edit Video” from the “More” dropdown menu. Anf you’ll see a tab labeled “Subtitles & Captions.” Click on it.
3. Create Auto Captions
Facebook offers an automatic captioning tool. Click on “Auto-Generate” to let Facebook automatically create captions for your video.
4. Review Your Captions
The automatic captions may not always be perfect. You can review and edit them for accuracy. Play the video and make adjustments to the caption text as needed.
5. Save the Video with Captions
Finally, You can now click “Save to Video”, and then, click the “Publish” to publish your new video.
How to Add Captions to a Video with Google Drive
Google Drive’s sharing features allow you to selectively share videos with individuals or groups of your choosing. However, unlike some dedicated video-sharing platforms, Google Drive does not automatically generate captions or subtitles for your videos.
To make your content more inclusive and informative, you have the option to manually input captions, ensuring that your audience can fully comprehend the video’s content.
Here’s how to add subtitles to video with Google Drive:
1. Upload a Video
Go to Google Drive, click the “+ New” button and select “File upload” to upload your video.
2. Create a Caption File
You can create a caption or subtitle file manually using a text editor like Notepad or use a dedicated captioning tool. Use a compatible format like SRT or VTT.
3. Upload the Caption File to Google Drive
Once you’ve created your caption file, upload it to the same folder where your video is located in Google Drive. Make sure the file names match exactly except for the file extension.
4. Add Your Captions
Choose “Manage caption tracks” to edit and insert captions into your Google Drive videos. In the right-hand menu, click “Add new caption tracks.” Proceed by either uploading or selecting your caption or subtitle transcript, inputting them accordingly. You can also specify the language of your captions and provide a title if desired. Finally, select “Upload” to finalize the procedure.
5. Test and Share
Access the video’s shareable link, and ensure the captions should be available when you play the video.
How to Add Captions to a Video with iMovie
You can use the iMovie app to add captions to a video on your Mac or iPhone device. Follow the steps:
1. Import Your Video
Import a video into iMovie by clicking on the “Import Media” button and selecting your video file.
2. Add Captions
First, move the playhead to the point in the video where you want to start adding captions. In Click on the “Titles” button in the toolbar, which looks like a T icon. Then, you can select a title style that suits your preference and your caption’s appearance, and type your caption.
3. Adjust the Duration
Adjust the duration of the caption by dragging its edges in the video timeline. You can place captions wherever needed in your video timeline.
4. Preview Captions
Play through your video to review the captions. Make any necessary adjustments to timing, appearance, or content.
5. Download Your Video
Once you’re satisfied with your captions, export your video with captions by clicking on “File” and “Share” to choose your desired export settings.
Conclusion
Whether you’re sharing videos on social media platforms, your website, or in educational contexts, adding captions ensures that your message is clear. We’ve explored 5 ways on how to add captions to a video in this blog, you can choose the method that suits your needs best, and start making your videos more accessible and impactful today. Thank you for reading!